Moohoo cowboys! I have successfully migrated from zimbra 9 to mailcow and want to share how to do it, with all mail and passwords!
Epigraph:
I found mailcow to be much more powerful and customisable than zimbra was. If you are in doubt whether to stay or migrate, I strongly recommend to migrate. I would also like to apologise for my poor english. It’s not my native language, I can read English much better than I can write it, but I will do my best.
Also, i’m not affiliated with mailcow developers, so if you find mistakes or if you know an easier way, feel free to criticise my manual.
Plot:
Chapter 1: Making account list in zimbra
Before proceeding, I strongly advise to remove all “deleted” or “locked” accounts so they will not be moved to cow server. Or at least, write them down somewhere to be deleted later.
Switch to user zimbra:
sudo su - zimbra
We need to make the list of all accounts first:
zmprov -l gaa > /tmp/emails.txt
In that list remove all closed or zimbra-related accounts such as:
Now we need to create csv file with contents like this: “email”,“password”,“name”
To make it, we need to do some zmprov queries again.
With any editor make this script somewhere, where zimbra is allowed to read it:
#!/usr/bin/env bash
while read -r email; do
info=$(zmprov -l ga "$email" userPassword displayName)
password=$(awk -F': ' '/^userPassword:/ {print $2}' <<< "$info")
name=$(awk -F': ' '/^displayName:/ {print $2}' <<< "$info")
printf '"%s","%s","%s"\n' "$email" "$password" "$name"
done < /tmp/emails.txt >> /tmp/users.csv
After that, make the script executable, and launch it with zimbra user.
This may take a while, after which, file /tmp/users.csv will be created.
The example content of this file:
Save both files (email.txt and users.csv) and copy them to mailcow server.
Chapter 2: Actually making mailcow accounts
There are two ways to do this.
The first way is making all accounts with mailcow api, and after that, change their passwords with tricky sql query.
The second way is to create all accounts with tricky sql queries.
I don’t know what is easier, but i chose the second approach, because one way or another, you will be forced to make sql queries, so why not to do it all sql way?
First, launch mailcow, create your domain (or domains) and copy users.csv file to
sudo cp users.scv /var/lib/docker/volumes/mailcowdockerized_mysql-vol-1/_data/mailcow/
After, make it readable by mailcow. Note, this is temporary file, it will be deleted soon, so 777 is normal.
sudo chmod 777 /var/lib/docker/volumes/mailcowdockerized_mysql-vol-1/_data/mailcow/users.csv
All queries, of course, can be done with bare cli, but it is better to see the results when you have gui.
So, we temporarily download adminer to our cow:
cd /opt/mailcow-dockerized/data/web/
sudo wget https://www.adminer.org/latest-mysql.php
Adminer is now available in our cow installation.
Let’s imagine, that out cow server has cow.domain.com url, so adminer url will now be:
http://cow.domain.com/latest-mysql.php
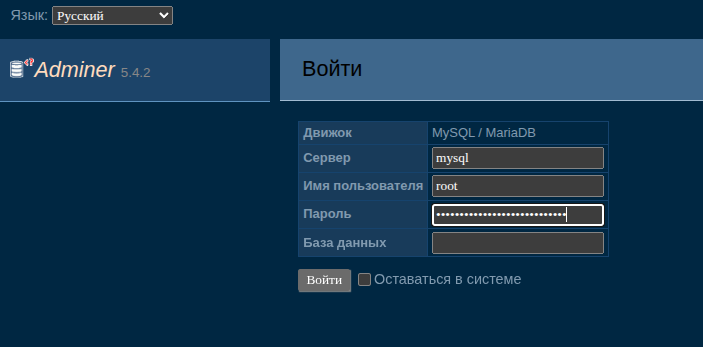
The name of server is just: mysql, username is root, and password you get from mailcow.conf: DBROOT=
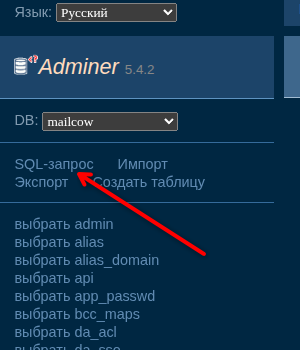
Choose the mailcow db and open SQL-query page:
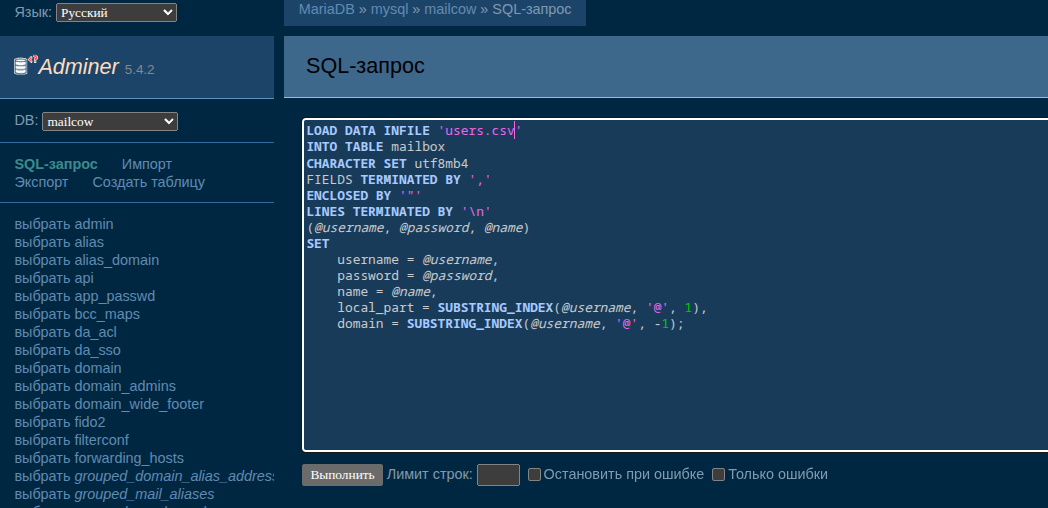
Our first query populates mailbox table:
LOAD DATA INFILE 'users.csv'
INTO TABLE mailbox
CHARACTER SET utf8mb4
FIELDS TERMINATED BY ','
ENCLOSED BY '"'
LINES TERMINATED BY '\n'
(@username, @password, @name)
SET
username = @username,
password = @password,
name = @name,
local_part = SUBSTRING_INDEX(@username, '@', 1),
domain = SUBSTRING_INDEX(@username, '@', -1);
quota = 0;
attributes = { "force_pw_update": "0", "force_tfa": "0", "tls_enforce_in": "0", "tls_enforce_out": "0", "sogo_access": "1", "imap_access": "1", pop3_access": "1", "smtp_access": "1", "sieve_access": "1", "eas_access": "0","dav_access": "0", "relayhost": "0", "passwd_update": "2026-06-02 12:13:19", "mailbox_format": "maildir:", "quarantine_notification": "hourly", "quarantine_category": "reject", "attribute_hash": ""};
Be careful with “attributes” line. It is one long line. The picture does not have this lines, but you should add them:
Now we need to populate our “aliases” table. Honestly, I don’t quite understand structure of this table, but when we add new user there, the record this type will be added:
So, we can again make query from file users.csv, of just copy from mailboxes.
I make a query from file users.csv again:
LOAD DATA INFILE 'users.csv'
INTO TABLE aliases
CHARACTER SET utf8mb4
FIELDS TERMINATED BY ','
ENCLOSED BY '"'
LINES TERMINATED BY '\n'
(@username, @password, @name)
SET
address = @username,
goto = @username
domain = SUBSTRING_INDEX(@username, '@', -1);
Now we must populate tables “quota2” and “user_acl”
Both of tables just need to have a copy of “mailbox” users there. So, we can fill them with two simple copy queries:
INSERT INTO quota2 (username)
SELECT m.username
FROM mailbox m
LEFT JOIN quota2 q ON q.username = m.username
WHERE q.username IS NULL;
INSERT INTO user_acl (username)
SELECT m.username
FROM mailbox m
LEFT JOIN user_acl u ON u.username = m.username
WHERE u.username IS NULL;
This is how result should look like:
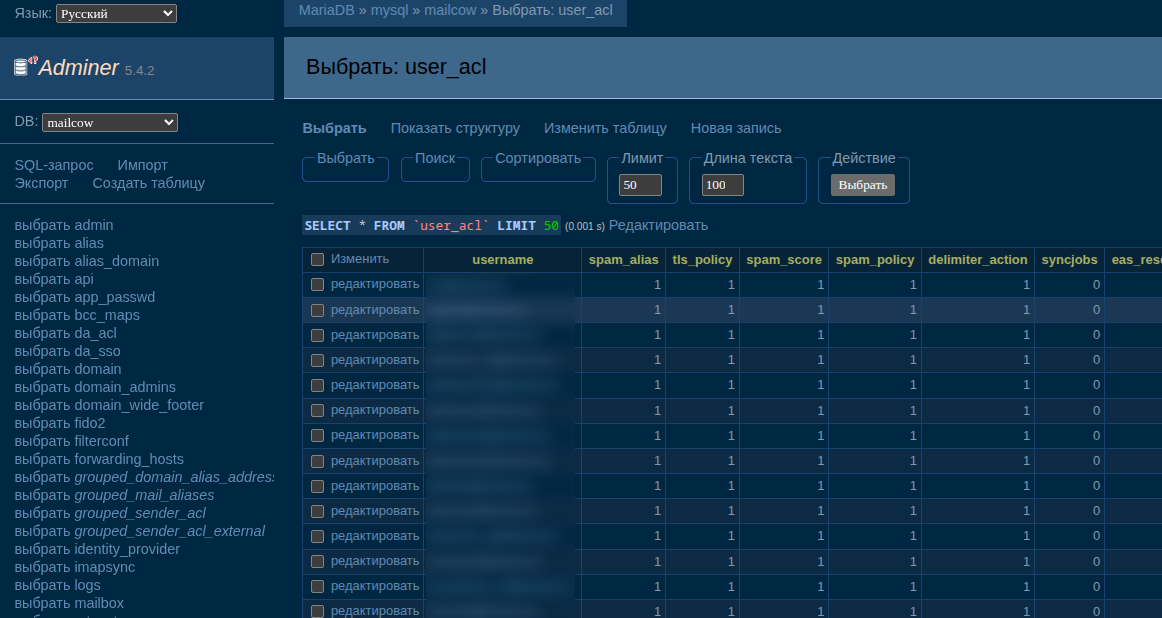
This is all you need to move all users with their passwords. Please, login to mailcow admin page and make sure mailboxes are displayed and can be edited.
If everything is ok, it’s time to move mail. And do not forget to remove latest-mysql.php and users.csv files!
Chapter 3: We moove mail
On this part, unfortunately, we need to break zimbra.
If you have a relatively small number of mailboxes (20-30), it is not so difficult to ask employees to enter their passwords to sync jobs. But if you have more mailboxes, or if employees work remotely, it becomes difficult.
So be prepared, that we will change all passwords on zimbra.
Do you remember email.txt file that we created at the very beginning?
It’s time has come.
We need to create dozens of sync jobs, with simple bash script and this file.
First, find “api key” in mailcow administration page, and save it to “mailcowapi” file.
After, create this script (somewhere in mailcow server will do):
#!/usr/bin/env bash
set -euo pipefail
MAILCOW_URL="https://cow.domain.com"
API_KEY="$(< mailcowapi)"
SOURCE_HOST="zimbra.domain.com"
SOURCE_PORT="993"
SOURCE_PASSWORD="123"
while IFS= read -r EMAIL; do
[[ -z "$EMAIL" ]] && continue
echo "Creating sync job for $EMAIL"
RESPONSE=$(
curl -s -k \
-X POST \
"${MAILCOW_URL}/api/v1/add/syncjob" \
-H "X-API-Key: ${API_KEY}" \
-H "Content-Type: application/json" \
-d "{
\"username\":\"${EMAIL}\",
\"host1\":\"${SOURCE_HOST}\",
\"port1\":\"${SOURCE_PORT}\",
\"user1\":\"${EMAIL}\",
\"password1\":\"${SOURCE_PASSWORD}\",
\"enc1\":\"SSL\",
\"mins_interval\":\"20\",
\"maxage\":\"0\",
\"exclude\":\"(?i)spam|(?i)junk\",
\"maxbytespersecond\":\"0\",
\"delete2duplicates\":\"1\",
\"delete1\":\"0\",
\"automap\":\"1\",
\"subscribeall\": \"1\"
\"skipcrossduplicates\":\"0\",
\"custom_params\":\"\",
\"active\":\"1\"
}"
)
echo "$RESPONSE"
done < emails.txt
Do not forget to change “SOURCE_HOST” to your zimbra server (and it’s better to use lan address, if you plan to switch mailcow to zimbra wan ip) and “MAILCOW_URL” to mailcow.
This script will create sync jobs for all mailboxes listed in emails.txt with password: “123”
As you can see, now we need to change all passwords in zimbra to “123”
It’s not difficult, but first you need to switch servers.
And prior to switching and actually syncing, you should tune your FTS settings. If you have huge mailboxes, you should give FTP engine more memory in mailcow.conf.
Warn your users, that they will temporarily loose access to their mail, while the synchronization jobs are running.
After that, swap mail servers (so mailcow become primary MX host with reverse dns ip configured correctly).
Now there will be a little problem with zimbra.
You must now change all passwords, but to do it, LDAP must be in working state.
More likely, your zimbra installation had ldap binded to external domain name, that is now occupied by mailcow.
You should OR edit /etc/hosts on zimbra server, to make external domain name point to local zimbra ip address, OR edit zmlocalconf to point ldap directly to local ip like this:
zmlocalconfig -e ldap_bind_url=ldap://localzimbra.domain.com:389
Either approach works.
When you fix it, restart zimbra and change all passwords with this script:
#!/usr/bin/env bash
MAILBOX_LIST="emails.txt"
NEWPASS="123"
while IFS= read -r account; do
[ -z "$account" ] && continue
echo "Changing password for $account"
sudo su - zimbra -c "zmprov sp '$account' '$NEWPASS'"
done < "$MAILBOX_LIST"
Or if you somehow lost your emails.txt, you can just change all passwords (launch it from zimbra user):
#!/usr/bin/env bash
NEWPASS="123"
for account in $(zmprov -l gaa); do
echo "Changing password for $account"
zmprov sp "$account" "$NEWPASS"
done
And that’s all. Wait until all sync jobs have completed, and remove them.
Epilogue:
This guide does not imply tranfer of zimbra “filters” “mail redirects” and “calendars” unfortunately this is the price of migration. But anyway, mailcow is much more flexible and with some work you can tune anything you like, so this price is justified.